 |
 |
| Moraine Lake, Banff, found here |
and this:
 |
| Kids playing pond hockey, from here |
and this:
 |
| Skiing in BC, found here |
and, oh! This! Pretty!
 |
| Banff Springs Hotel, found here |
I didn't take those (I wish).
So. Canada, eh? (You knew it was coming, admit it. Eh?) Yes, Canada. I love the place.
My Dad worked in Calgary for a while when I was in college, and we visited him there. We got to go up to Banff, which I fell in love with immediately.
So. Canada, eh? (You knew it was coming, admit it. Eh?) Yes, Canada. I love the place.
My Dad worked in Calgary for a while when I was in college, and we visited him there. We got to go up to Banff, which I fell in love with immediately.
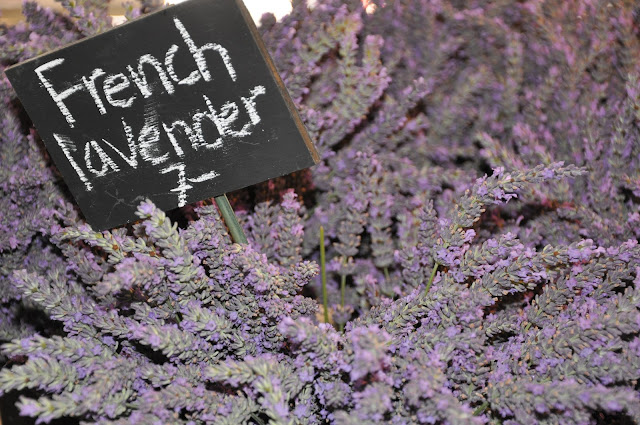
We also were lucky enough to go to Vancouver for the Winter Olympics in 2010, via Seattle. Seattle deserves its own story, but I can't post about it without throwing in a couple pics. Pike Place Market is like heaven for foodies, photographers, or, well, pretty much everyone. Seriously. Go there.
OK, that's enough. (I did take those ones!) I'll probably do a post for Seattle some day, even though I've never made anything there. Ate plenty though.
You can see this.
And this.
And this.
And this.
And this (yes, please!).
OK, that's enough. (I did take those ones!) I'll probably do a post for Seattle some day, even though I've never made anything there. Ate plenty though.
Anyway, I was saying that Canada is awesome. The people are wonderful, the scenery is breathtaking, and the winters are delightful. OK, I'm kidding about the winter part, but it really is a great place.
But what on earth does it have to do with baking? Ahh, you want to hear about cakes and stuff. I see. Well, Cindy, a friend of ours, is from Canada, and she joined us here in Colorado last summer with her teammates from the Canadian Olympic Speed Skating team. I baked them a cake. Naturally.
Cindy loves chocolate, so the first time she came to stay with us (two summers ago), we had a Canada Day celebration and I made a chocolate cake. This time though, I made Colette Peters' chocolate cake, which is To. Die. For. And by now, y'all know that I am cheesy enough to do the whole Canada-themed thing again. Canada/Chocolate themed, to be specific. Carved into the shape of a maple leaf (not as hard as I thought it would be, actually). Chocolate maple-leaf-shaped cake with chocolate buttercream, encrusted in M&Ms. Do you need a moment? I do.
I do need to say, these guys are great. They were all so friendly and funny, and incredibly talented. I feel so lucky that I can call Cindy a friend, and I hope that she and her teammates get the chance to come see us in Colorado again.
Here we all are, right before we devoured this cake in about 3 minutes flat.
And here's the cake again. It's the same picture from before. This was during my pre-blog days, so I didn't take about 8 thousand pictures of everything I make, hoping one will be halfway decent. You get the idea.
Here we all are, right before we devoured this cake in about 3 minutes flat.
And here's the cake again. It's the same picture from before. This was during my pre-blog days, so I didn't take about 8 thousand pictures of everything I make, hoping one will be halfway decent. You get the idea.
Wanna make the cake? You should. More than once, people who "don't like cake" have told me that this cake is delicious. (Yes, I know people who don't like cake. They are not included in my will.)
So do it. Here's the recipe.
Chocolate-Coffee-Whiskey Cake
Very slightly adapted from Cakes to Dream On, by Colette Peters ("Coco-Loco Cake")
Ingredients
2 cups all-purpose flour
1 teaspoon baking soda
pinch of salt
1 3/4 cup hot coffee
1/4 cup bourbon
5 ounces unsweetened baking chocolate, cut into small pieces
2 sticks (8 oz) unsalted butter, cut into small pieces
2 cups sugar
2 eggs, at room temperature
2 teaspoons vanilla extract
Directions
Preheat the oven to 285° (the original recipe calls for 275°, but it worked a little better for me when I upped it a little).
Spray two round 8" pans with baking spray and line the bottoms with parchment paper.
Sift together the flour, baking soda, and salt into a bowl and set aside.
In another large bowl, combine the hot coffee (it must be hot for this to work), bourbon, chocolate, and butter. Cover (I just use a plate) and let stand for about 10-12 minutes, until everything has melted. When the chocolate/coffee/bourbon/butter mixture has melted, whisk in the sugar and let the whole mixture cool.
Whisk in the flour mixture in two batches, then the eggs and vanilla.
The batter will be runny, but don't worry, it's supposed to be.
Pour the batter into prepared pans and bake for 45 min or until a toothpick inserted into the center comes out clean. You may need to rotate the pans for even baking, depending on your oven.
Let the cakes cool completely in their pans on a wire rack.
Frost with Chocolate Buttercream.
I encrusted my cake with M&Ms. I had to go find bags of red and white ones, since white ones don't exist in a regular bag, and I was so not picking through a bag to get enough red ones. You can get specialty one-color bags of M&Ms at party supply stores or online. I turned them logo-side down (sorry Mars, Inc.) for a clean look. I think it's kind of a fun effect, and who doesn't like M&Ms?
*Note: This cake is notorious (in my world) for sinking in the middle. I do believe it is the altitude, as I made it once for a wedding in Fort Collins, and there was no sinking to speak of. If you live at altitude, try raising the baking temperature a tad like I do, or add a little flour (about a tablespoon per cup). You also might want to make the baking soda a scant teaspoon. Experiment. There are tons of websites out there to help you figure out high altitude baking. If you don't live at altitude, it should work fine.
To decorate this cake, you want to refrigerate it first. It makes it a lot easier to handle and frost. And if you intend to carve it, like I did for this cake, definitely refrigerate it if you don't want it to fall apart. Refrigerate it between crumb coating and the final coat of frosting too.
To carve cakes, you want to use a sharp serrated knife, and cut slowly and carefully. You can always cut more, but you can't cut less. Measure twice, cut once. Enough construction idioms? OK fine, but seriously, don't let carving be daunting. It's fun. The worse thing that can happen is, well, the cake falling apart. But then you can make cake pops!
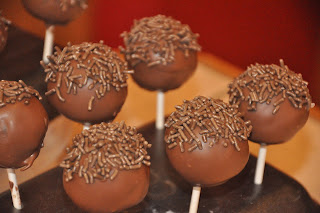
For those of you who have read my blog before, closely enough to notice the mention of the disastrous stickless cakepops balls that marked my early foray into the world of cake pops...feast your eyes now on these sad little things. I have to say though, that if you ate one, you wouldn't give a rat's you-know-what about their appearance. My proof of this is that they were gone so fast I actually thought I had forgotten to put them out on the table with the other food.
Very slightly adapted from Cakes to Dream On, by Colette Peters ("Coco-Loco Cake")
Ingredients
2 cups all-purpose flour
1 teaspoon baking soda
pinch of salt
1 3/4 cup hot coffee
1/4 cup bourbon
5 ounces unsweetened baking chocolate, cut into small pieces
2 sticks (8 oz) unsalted butter, cut into small pieces
2 cups sugar
2 eggs, at room temperature
2 teaspoons vanilla extract
Directions
Preheat the oven to 285° (the original recipe calls for 275°, but it worked a little better for me when I upped it a little).
Spray two round 8" pans with baking spray and line the bottoms with parchment paper.
Sift together the flour, baking soda, and salt into a bowl and set aside.
In another large bowl, combine the hot coffee (it must be hot for this to work), bourbon, chocolate, and butter. Cover (I just use a plate) and let stand for about 10-12 minutes, until everything has melted. When the chocolate/coffee/bourbon/butter mixture has melted, whisk in the sugar and let the whole mixture cool.
Whisk in the flour mixture in two batches, then the eggs and vanilla.
The batter will be runny, but don't worry, it's supposed to be.
Pour the batter into prepared pans and bake for 45 min or until a toothpick inserted into the center comes out clean. You may need to rotate the pans for even baking, depending on your oven.
Let the cakes cool completely in their pans on a wire rack.
Frost with Chocolate Buttercream.
I encrusted my cake with M&Ms. I had to go find bags of red and white ones, since white ones don't exist in a regular bag, and I was so not picking through a bag to get enough red ones. You can get specialty one-color bags of M&Ms at party supply stores or online. I turned them logo-side down (sorry Mars, Inc.) for a clean look. I think it's kind of a fun effect, and who doesn't like M&Ms?
*Note: This cake is notorious (in my world) for sinking in the middle. I do believe it is the altitude, as I made it once for a wedding in Fort Collins, and there was no sinking to speak of. If you live at altitude, try raising the baking temperature a tad like I do, or add a little flour (about a tablespoon per cup). You also might want to make the baking soda a scant teaspoon. Experiment. There are tons of websites out there to help you figure out high altitude baking. If you don't live at altitude, it should work fine.
To decorate this cake, you want to refrigerate it first. It makes it a lot easier to handle and frost. And if you intend to carve it, like I did for this cake, definitely refrigerate it if you don't want it to fall apart. Refrigerate it between crumb coating and the final coat of frosting too.
To carve cakes, you want to use a sharp serrated knife, and cut slowly and carefully. You can always cut more, but you can't cut less. Measure twice, cut once. Enough construction idioms? OK fine, but seriously, don't let carving be daunting. It's fun. The worse thing that can happen is, well, the cake falling apart. But then you can make cake pops!
For those of you who have read my blog before, closely enough to notice the mention of the disastrous stickless cake
 |
| Aaahhh, cake balls. You win this time. |
And here's the Canadian Cake again. I know you wanted to see it a third time.
Enjoy!


